10 Cool Kids’ Activities with Reddy Ice
Whether you’re looking for screen-free entertainment, a fun way to beat the heat, or an engaging activity for a group of kids, these 10 ideas are designed to deliver maximum fun with minimum prep – all using Reddy Ice Premium Packaged Ice.
Each activity includes a materials list and clear steps so you can get started.
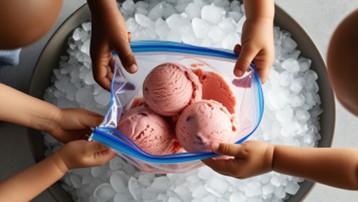
1. Ice Cream in a Bag
What You Need:
- 4–6 cups Reddy Ice Premium Packaged Ice
- 1 small resealable bag
- 1 large resealable bag
- 1 cup heavy cream or half-and-half
- 2 tbsp sugar
- ½ tsp vanilla extract
- Rock salt
How to Make It:
1. Pour cream, sugar, and vanilla into the small bag and seal tightly.
2. Fill the large bag halfway with Reddy Ice Premium Packaged Ice and ½ cup rock salt.
3. Place the small bag inside the large one and seal.
4. Shake for 5-10 minutes until the cream becomes soft-serve.
5. Remove, rinse the inner bag, and enjoy!
Why Use Reddy Ice?
Reddy Ice Premium Packaged Ice undergoes an additional drying phase during production, resulting in cubes that melt slower than those from your at-home freezer.
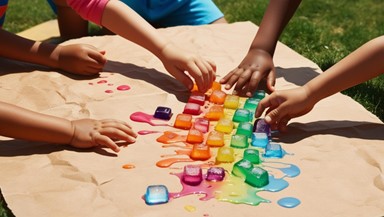
2. Ice Cube Painting
What You Need:
- Reddy Ice Premium Packaged Ice
- Washable paint or food coloring
- Bowls or trays
- Watercolor paper or cardstock
- Tongs or gloves (optional)
How to Make It:
1. Place Reddy Ice Premium Packaged Ice in a bowl or tray.
2. Add in drops of paint or food coloring based on the color saturation you’re looking for.
3. Let kids slide, stamp, or swirl the cubes across paper.
4. Watch the colors melt and mix into beautiful designs.
Why Use Reddy Ice?
No need to pre-freeze colored cubes – Reddy Ice Premium Packaged Ice is ready to go right out of the bag.
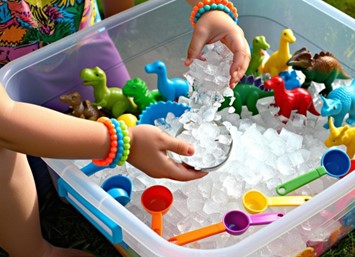
3. Sensory Ice Bin
What You Need:
- 1-2 bags of Reddy Ice Premium Packaged Ice
- Large plastic bin or storage container
- Tongs, spoons, measuring cups
- Food coloring (optional)
- Plastic animals or toys
How to Make It:
1. Pour Reddy Ice Premium Packaged Ice into the bin.
2. Add toys, scoops, and tools for exploring.
3. Add drops of food coloring to create color zones or “lava.”
4. Let kids explore, sort, scoop, and mix.
Why Use Reddy Ice?
Provides texture, cold, and volume for a rich sensory experience that lasts – no need to wait for freezer trays to catch up.
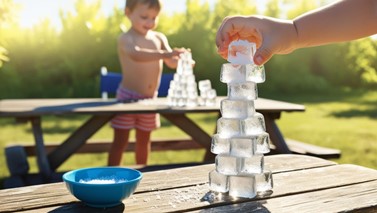
4. Ice Tower Challenge
What You Need:
- Reddy Ice Premium Packaged Ice
- Salt and/or sugar
- Tray or flat surface
- Timer (optional)
How to Make It:
1. Place Reddy Ice Premium Packaged Ice on a tray.
2. Challenge kids to stack them as high as possible.
3. Use salt to help cubes stick together and compare with plain stacks.
4. See which stack lasts longest before melting or falling
Why Use Reddy Ice?
Uniform cube size and large quantity make this challenge fun, consistent, and repeatable.
5. Arctic Animal Habitat
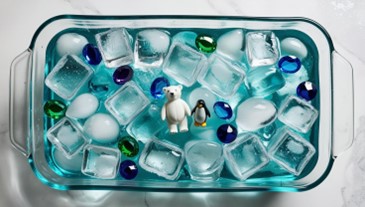
What You Need:
- 1 bag of Reddy Ice Premium Packaged Ice
- Clear bin or tray
- Plastic polar animals, penguins, etc.
- Water
- Blue food coloring (optional)
- Mini blocks or foam pieces for icebergs
How to Make It:
1. Fill a bin with Reddy Ice Premium Packaged Ice.
2. Add water and a drop of blue coloring for a realistic look.
3. Place animals and floating “icebergs” into the scene.
4. Encourage kids to role-play and explore.
Why Use Reddy Ice?
Creates an instant icy world with real cold and crunch – perfect for tactile, immersive learning.
6. Ice Potion Station

What You Need:
- 1-2 bags of Reddy Ice Premium Packaged Ice
- Baking soda
- Vinegar
- Food coloring
- Dish soap
- Cups, droppers, or squeeze bottles
How to Make It:
1. Pile Reddy Ice Premium Packaged Ice into a tray or bin.
2. Sprinkle baking soda over the ice.
3. Mix vinegar with food coloring and a little dish soap in bottles.
4. Pour over the ice and watch it bubble, fizz, and foam.
Please ensure that children are supervised by an adult when performing this activity.
Why Use Reddy Ice?
It enhances the reaction and creates dramatic sounds and sights – crackling, steaming and fizzing galore.
7. Melty Rainbow Race
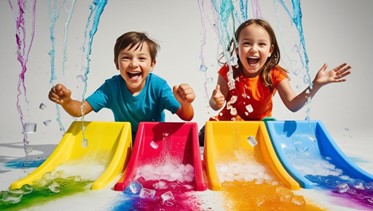
What You Need:
- Reddy Ice Premium Packaged Ice
- Food coloring
- Baking sheets, plastic gutters, or plastic/cardboard ramps
- Water droppers or straws
- Towels (for melting cleanup)
How to Make It:
1. Color batches of Reddy Ice Premium Packaged Ice with different food dyes.
2. Line them up at the top of a ramp.
3. Use water droppers or puffs of air to move cubes down.
4. See whose melts or slides fastest!
Why Use Reddy Ice?
Its shape and density create consistent, race-worthy results without needing to prep cubes in advance.
8. Chill-and-Smash Balloons
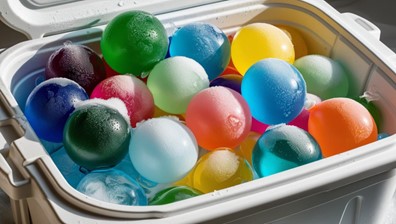
What You Need:
- Reddy Ice Premium Packaged Ice
- Water balloons (filled and semi-frozen)
- Bin or kiddie pool
- Toy hammers or mallets
- Prizes or glitter (optional)
How to Make It:
1. Fill and partially freeze water balloons.
2. Nest them in Reddy Ice Premium Packaged Ice to stay cold during play.
3. Let kids smash them to reveal what’s inside!
4. Add tiny toys or colored water for surprises.
Why Use Reddy Ice?
Keeps balloons cold, extends playtime, and makes the smash feel more dramatic and satisfying.
9. Color Crash Lab
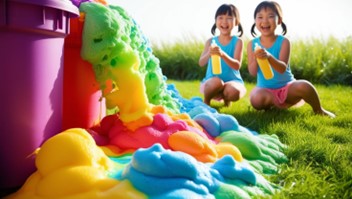
What You Need:
- 1-2 bags of Reddy Ice Premium Packaged Ice
- Baking soda
- Vinegar (white or cleaning-strength)
- Dish soap
- Liquid watercolors or food coloring
- Plastic cups, bowls, or large plastic bins
- Optional: squeeze bottles, measuring cups, goggles, old clothes or swimsuits
How to Make It:
1. In each bowl or cup, place a generous scoop of Reddy Ice Premium Packaged Ice, 1–2 tablespoons of baking soda, and a few drops of liquid watercolor or food coloring.
2. Add a squirt of dish soap for foamy eruptions.
3. When ready, let kids dump in vinegar or squirt it from squeeze bottles — and watch the colorful, cold foam erupt and overflow!
4. Do it over grass, pavement, or in an empty kiddie pool. The mess washes away easily and the ice keeps everything extra cool and fizzy.
Please ensure that children are supervised by an adult when performing this activity.
Why Use Reddy Ice?
The ice slows down and intensifies the reaction, adds dramatic foggy cold effects, and makes the whole experience more sensory-rich. You can’t get the same contrast or volume using room-temperature materials – and it’s 10x more fun when it’s chilly on a hot day.
10. Glow Smash Splash
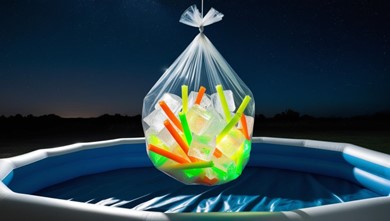
What You Need:
- 1-2 bags of Reddy Ice Premium Packaged Ice
- 1 large clear kitchen trash bag (drawstring works best)
- Assorted glow sticks, glow bracelets, or waterproof LED toys
- Inflatable kiddie pool (empty at first)
- Rope or strong string
- A broom handle, plastic bat, or stick
- Optional: water to fill the pool after the smash
- Towels for cleanup
How to Make It:
1. Activate glow toys and place them in the trash bag.
2. Add 1-2 bags of Reddy Ice Premium Packaged Ice – enough to weigh it down but still allow it to swing.
3. Tie the bag securely and suspend it over the empty inflatable pool using a tree branch, swing set, or even a broomstick between ladders.
4. One at a time, kids take turns swinging at the glowing ice bag piñata until it breaks open.
5. Once it bursts, the pool fills with glowing ice and cold toys!
6. Let the kids jump in, explore the glow, and cool off – you can add water to the pool for even more splashy fun.
Please ensure that children are supervised by an adult when performing this activity.
Why Use Reddy Ice?
The sheer volume, crunch, and fast-acting chill of Reddy Ice Premium Packaged Ice make this activity possible – it turns an ordinary glow party into a night-time sensory explosion. Home ice trays can’t create the satisfying smash or keep the pool cold enough for a long play session.
Want to try them all? Grab a few bags of Reddy Ice Premium Packaged Ice from your local grocery or convenience store and turn your backyard into a cool zone of creativity, learning, and play. No freezing trays, no planning ahead – just pour, play, and chill.
